How to Climb Kilimanjaro
Taking on any big challenge requires a lot of thought and planning, and they don’t get much bigger (or higher) than trying to summit Kilimanjaro. The tallest freestanding mountain in the world, the highest mountain in Africa, and one of the seven summits, Kilimanjaro stands at 5895m and is located in Tanzania, East Africa.
When you quickly Google Kilimanjaro, you can get lost in a barrage of information. So, we hope this small guide can help you make a logical choice to help you get to the summit.
We will break this guide down into the following sub-titles: 1. Which route to climb? 2. What time of the year should I climb? 3. How to deal with altitude? 4. What equipment will I need? 5. How to prepare for the climb? 6. What is it like to camp on Kilimanjaro? 7. What is summit day like?
This blog has been written by Jack Fleckney, Craghoppers' Ambassador and Founder of Legend Expeditions.
Routes on Kilimanjaro
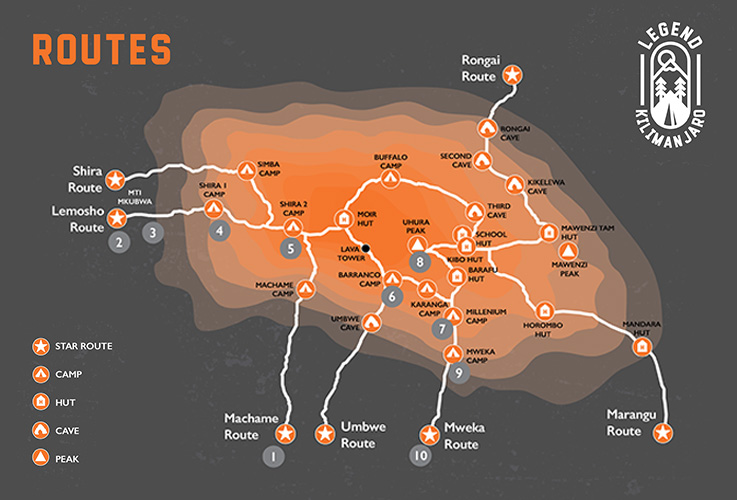
Ok, routes. Which way should you climb up Kilimanjaro? As you can see from the image, there are numerous ways to climb up the mountain. The main three routes people use on the mountain are:
- The Marangu Route - 70km, 5-6 days
- Machame Route - 61km, 6-7 days
- Lemosho Route - 67km, 7-8 days
The Marangu route climbs the mountain from the eastern side and is the only route where you don’t need to camp, as they have huts along the route. It is often called the easiest route to use, but don’t be fooled. Its steep altitude gain makes acclimatisation very difficult, resulting in a lower chance of summiting.
The Machame route is usually the busiest route on the mountain and goes up via the southern slope. It is a beautiful route, although in our opinion, it doesn't offer the most ideal way of acclimatizing with a rapid ascent over 3000m.
The Lemosho Route is our favourite for clients to climb. Although it is a longer ascent, the extra days and slower altitude gain each day give you the best chance of acclimatising effectively. You also get to see the crater from across the Shira plateau as you exit the rainforest, which is stunning! The one challenge of doing this route over 8 days is the fact that you have to camp for 7 nights on the mountain. This can be a shock to some people, but we will cover camping lower down in this blog!
When to Climb Kilimanjaro
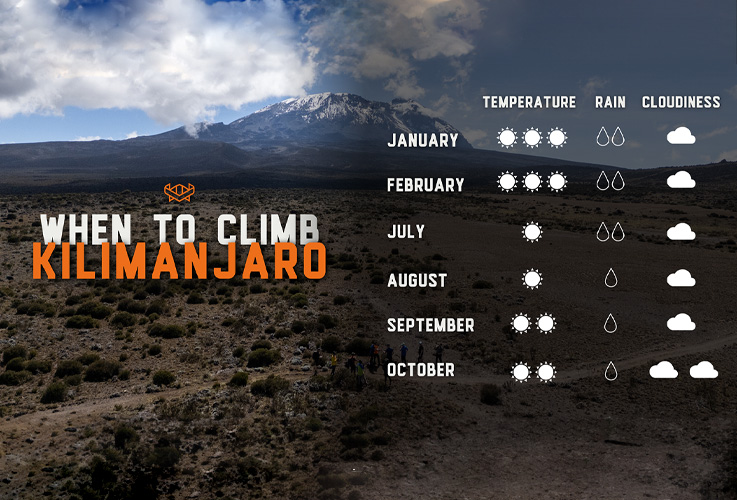
Because Kilimanjaro sits very close to the equator, it doesn’t experience wide temperature changes throughout the year. At the base of the mountain, the average temperature is around 21 to 27 °C and at the summit, Uhuru Peak, the nighttime temperatures can range between -7 to -29 degrees. Like all great mountains, Kilimanjaro creates its own weather, which can be extremely variable and difficult to predict. You need to be prepared for warm, sunny conditions, rain, wind, cold, and even snow!
As you can see from our picture, there are key months we recommend climbing that are outside of the rainy season. Not many people climb Kilimanjaro in the rainy season.
The long rainy season between March and May is a result of the trade winds from the southeast. These southerly winds from the Indian Ocean are laden with moisture, bringing rain to the lower slopes and snow on the top of Mount Kilimanjaro summit. During this season, the southern slopes get the most rainfall.
The ‘short rains’ in November are from a dryer wind coming from the northeast. As it hasn’t travelled across an ocean, the rains are shorter and less intense than during the long rains. Most of the rainfall during this season falls on the more northerly slopes.
The two main climbing seasons are January + February and then July, August, September, and October. In January and February, it is a little warmer than the other months. Although in August, September, and October, there is less rain.
Our favourite months to climb are February, August, September, and October.
How to Deal with Altitude
As you climb higher up Kilimanjaro, the amount of oxygen doesn’t actually decrease. In fact, the percentage of oxygen in the air is the same at 20.9%, however, its availability is reduced by the reduction in air pressure. What this means in simple terms is that for any volume of air you breathe in, there are fewer molecules of oxygen available.
As you make your way up the mountain, you can begin to react to the smaller amount of oxygen absorbed in your body. Firstly, don’t panic as this is totally normal.
Your body will acclimatise by producing more red blood cells to counteract the small amount of oxygen in your bloodstream.
Another thing to remember is that you will usually need to urinate more at altitude due to the adaptation. This is because your body increases your breathing volume to take in more oxygen, which means you expel more carbon dioxide. This affects the pH of your blood, and your kidneys then produce more urine to counteract the pH change.
The best way to acclimatise is by picking the correct route to the summit. As stated in the ‘Routes’ section above, the Lemosho route offers the best way to allow your body to adapt to the altitude change with extended time between 3000 and 4000m.
The NHS recommends combating AMS with these medicines:
- Acetazolamide (like Diamox) to prevent and treat AMS – you need a prescription for this from your doctor.
- Ibuprofen or paracetamol for treating headaches and other pains.
- Anti-nausea medication like promethazine for treating nausea.
There are also natural remedies you can try for treating mild symptoms of altitude sickness on Kilimanjaro. These include ginger, lavender oil, garlic, and cloves.
Finally, ‘Pole Pole’ (Slowly does it). A nice slow steady pace allows your body to adapt properly without having to deal with the added pressure of being constantly fatigued.
Luckily the mountain is covered with amazing guides and medical professionals, so if you do feel any form of altitude sickness, there is help for you.
It is important to say that most people will feel some reaction to altitude. As a guide, I look for any severe change in symptoms. Here are some of the things you may experience on the mountain.
Mild AMS - In its mildest form, the symptoms can resemble those of a hangover, with nausea, headache, fatigue, and a loss of appetite. If you experience any of these symptoms, it’s important to tell your guides and not simply try to push through. Mild symptoms can often be resolved with rest and adequate hydration.
Moderate AMS - If the symptoms of mild AMS start to worsen, such as a headache that you can’t shift, dizziness, coughing, shortness of breath, nausea, and vomiting, this is an indication that you are not adapting to the altitude (acclimatising) and that you are experiencing moderate AMS. To resolve these symptoms, you need to rest, hydrate, use adequate medication, and attempt to stay level (or descend) in altitude. Before moving on to the most serious kinds of altitude sickness, we want to say that AMS isn’t serious; however, it can be unpleasant.
HACE and HAPE - HACE and HAPE symptoms usually happen when moderate AMS is ignored, and you continue gaining altitude. HAPE is a buildup of fluid in the lungs, and HACE is the swelling of the brain. These illnesses are extremely rare, and the earliest symptoms will be recognised by your guides. If your symptoms worsen and progress to moderate AMS, we recommend you don’t continue to gain altitude and allow your guides to track your symptoms and O2 levels. The best way to remove symptoms is by decreasing in altitude.
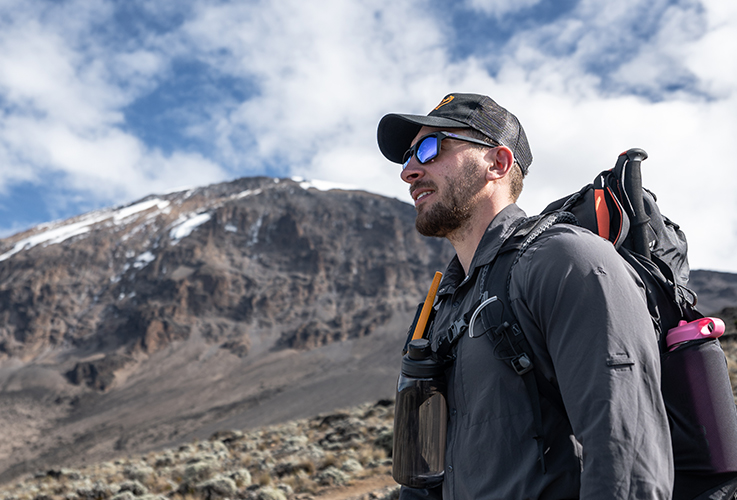
What Equipment Will I Need to Climb Kilimanjaro?
Although we don’t want to bombard you with information on every piece of equipment, there are some key items you need to know about.
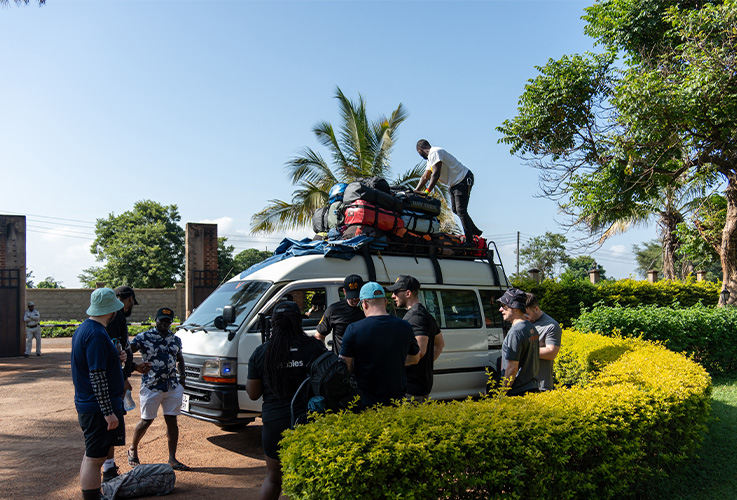
Bags - You will need a larger bag for your porters to carry up the mountain. We recommend a duffel bag that can hold around 60 litres. Remember that your bag shouldn’t weigh more than 14kg, under Porter rules. Don’t worry though, it is very easy to keep under this weight. Your backpack should be comfortable and capable of holding at least 35 litres. During the first few days of the trek, you’ll wonder why you need a bigger bag, but as it gets colder, you’ll want to have extra layers, including your larger jacket. You want to do some training with it on and make sure it is comfortable as you’ll be wearing it for quite a few hours every day.
Boots - The most important item on your Kilimanjaro packing list is a pair of comfortable, worn-in hiking boots. We also highly recommend you either wear your boots when on the plane or have them in your hand luggage. They will be your most vital item on the climb, and all other lost equipment can be rented in Tanzania. While you can rent boots, having your own is crucial to success on Kilimanjaro.
Sleeping Bag - Looking at sleeping bags can be a confusing task, with lots of different categories and ratings. The most important factor for you is the warmth rating. Remember the campsites get cold at night, so you need a really warm sleeping bag. We recommend a bag that says 4 season and has a warmth rating between 0 and -5 degrees.You can usually get either a down or synthetic sleeping bag. Down is the natural product and has the best warmth capabilities although it is harder to wash and isn’t good if it gets wet. Synthetic is usually cheaper, not as warm, easier to wash, and better when wet. We recommend a mummy-shaped bag, as it is more comfortable and warmer. The hood on your sleeping bag should have a drawstring that allows you to close the gap around your head, where most of the warmth is lost.
Bottles - You will often read about the benefits of a hydration pack on Kilimanjaro. While it is a great way to sip water continuously during the trek, there are some downsides. Firstly hygiene, it is really hard to keep the hose and sucker clean, especially as it is dusty and can be placed on the floor when not wearing your backpack. Also, water in the hose can freeze on the final summit day. Water bottles are the most reliable purchase for Kilimanjaro, and you will want to carry two larger bottles (1-1.5 litres each). On summit day, you can place the water bottles in a thermal sock to keep them as warm as possible. Water freezes top to bottom so you can place the bottles upside down on summit day to allow you to still be able to drink from them. Finally, we recommend a thermos flask for hot drinks throughout the trip.
Down Jackets - You're likely to start wearing your winter jacket when you reach the moorland zone. You'll certainly be wrapping up in it from the alpine desert zone, and it's also your best friend at camp in the evenings. When looking at jackets, remember to consider the warmth rating and how much fill it has in it. You want to have a fill rating of 650 or more and one that can deal with below 0 temperatures.
Waterproof Jacket - These jackets aren’t just for wet weather but also high winds and can create another fantastic barrier against the cold. Make sure the jacket can fit over your layers.
Underwear and Socks - Your sock choice is vital to comfort, so make sure you have tested them out before the climb. We recommend having at least one set of thermal socks and underwear for summit day.
Base layer - Again, these are lovely to wear at camps in the evening and especially for summit day. Merino wool is the most popular choice.
Mid-layer - Your middle layer is for your torso and is worn over your base layer. This garment should be comfortable and easy to move in. We recommend a thin fleece for this layer.
Top - This is usually some sort of shirt. Our only advice here is to try and avoid cotton, as it doesn’t dry quickly and can result in getting cold pretty quickly!
Walking Trousers/Leggings – These are down to personal preference, we recommend that you have some that are comfortable and allow a good range of movement. For walking trousers, ensure they are wide enough at the bottom for your boots.
Accessories - Pick a sunhat that protects the whole of your head. For the summit day, you will want two hats. A warm hat and a buff or balaclava. The double layer is vital for warmth on the summit day. Finally, gloves, you will want two pairs of gloves. One thinner pair and a thicker summit pair. Make sure your thicker pair are larger than normal so you can wear both pairs of gloves, and they don’t constrict your hands.
Technology - During the climb, there are areas where you will get a signal and your phone is great for capturing pictures and videos. Remember there is no power on the mountain, so you will need to bring a power bank to keep it charged up. Check how many charges you can get from it so you can plan usage on the mountain. Also, batteries perform worse in colder temperatures, so you’ll need to keep your items warm on the final push if you plan to use them on the summit. You can also bring your own cameras on the mountain. Remember you need to keep your bag under 14kg in weight, so you may have to carry the extra weight yourself. Drones are a no-go on Kilimanjaro unless you want to pay the large fees to gain a permit. Finally, your head torch. You will use this around camp at night and mainly on the summit morning. You don’t need a huge torch. A lightweight one with good battery life will be fine.
How to Prepare for the Climb up Kilimanjaro
This training section is written by our Strength and Conditioning Coach Rhys.
The sooner you can start, the better ultimately; however, three months of regular training and movement will be more than sufficient to get you into a great position to comfortably climb and enjoy all the beauty in store while on the mountain.
With Kilimanjaro being so high, altitude is a huge factor in the climb. Many who attempt it too fast or without ample acclimatisation time end up suffering from altitude sickness symptoms, putting their summit goal to a halt.
Although no amount of training, in the gym or out walking, can prepare you for altitude, being able to recover quickly from harder, more anaerobic bouts of the climb, as well as the ability for your muscles and lungs to perform for longer aerobically and recover from fatigue faster, will allow you to:
- Enjoy every step of the hike
- Take in the breathtaking views
- Soak up the culture
- Recover fast enough to go again the next morning
The first week or two should be about getting into good habits and finding some consistency. Not only in your training but also in key elements for your specific training, such as your step count.
As well as this, if your goals include weight loss or weight gain elements, getting the correct nutrition on board is crucial for success. It is paramount that you keep protein at or above set targets, as well as ensuring the food you are eating is balanced, nutritious, and fuelling appropriately for the increased training load.
The following 10 to 12 weeks should follow different training methods, including strength, aerobic endurance, anaerobic capacity, and injury prevention, to ensure you are in the best position to make it up to the summit injury-free and fresh enough to savour every moment along the climb.
The final week or two will taper down the training, allowing the body to recover in time for the hike.
What is it Like to Camp on Kilimanjaro?
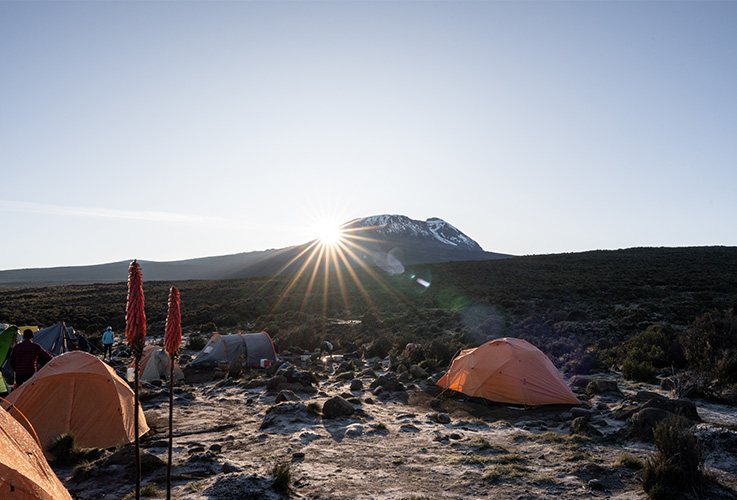
We want to give you an overview of how we operate our camping routines on the mountain. When booking a trip with someone, we highly recommend you check if they do anything differently.
Every morning, the Legend team will give you a wake-up call between 6-7 am. We will provide you with a knock with a nice hot cup of coffee or tea to have inside your sleeping bag!
You’ll more than likely be sharing a tent with one of your teammates, and after a hot drink, you’ll begin to get up and get dressed. Next, you’ll repack your duffel bag and prepare your day bag with everything you will want for the day’s hike (the team will advise you each day).
The Legend team will have been up for a while preparing breakfast, which will be ready for 7 am. You’ll eat breakfast in the mess tent, which comes kitted out with a table, chairs, and cutlery! We’ll all gather here for the day’s briefing and as we head higher up the mountain.
Finally, you’ll be able to refill your water bottles before we prepare to continue up the mountain. We aim to leave around 8 am.
With backpacks on, we begin our trek up to the next camp. You’ll notice the pace will be nice and slow (“pole pole”), with lots of breaks for pictures, water, and going to the toilet. Toilets… if you need one during the trek, it will have to be a nature toilet! But don’t worry, there are plenty of rocks to hide behind, and it wouldn’t be a proper adventure without at least one!
After we set off, the Legend team will pack up the camp and come flying past us to get to the next camp and set up. Some of the team will stop to set up a lunch area where we will have either a hot lunch or a packed lunch.
We aim to get to the next camp before 4 pm. You’ll be welcomed into camp with tea and biscuits, which you can enjoy while watching the sunset!
On arrival at camp, you’ll find your tent ready for you, and your duffel bag inside. It’s important to change out of any damp clothing (whether from rain or perspiration), roll out your sleeping bag so it has a chance to “fluff up” (a compressed sleeping bag doesn’t insulate well), before heading over to the mess tent for a tea time snack and hot beverage. We also recommend getting out of your boots and putting your comfier shoes on!
Dinner is usually served around 7 pm in the mess tent, where we will briefly discuss the next day. The rest of the evening is free time. Often climbers head off to bed early, but the mess tent is well lit, meaning you can read, chat, and relax before bed.
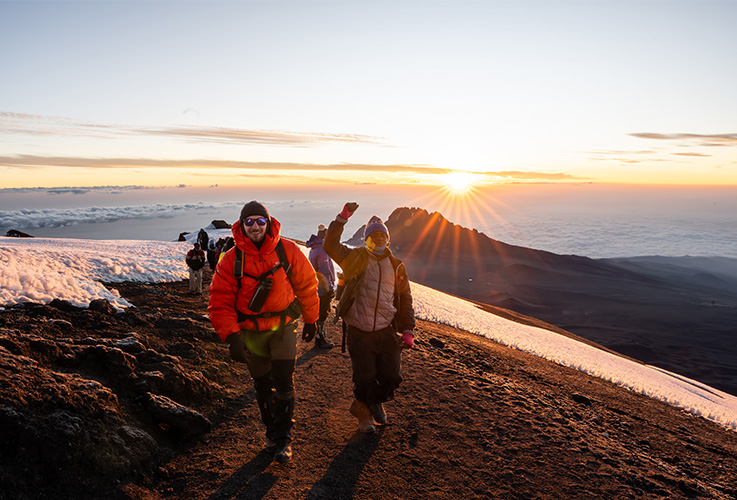
What is Summit Day Like?

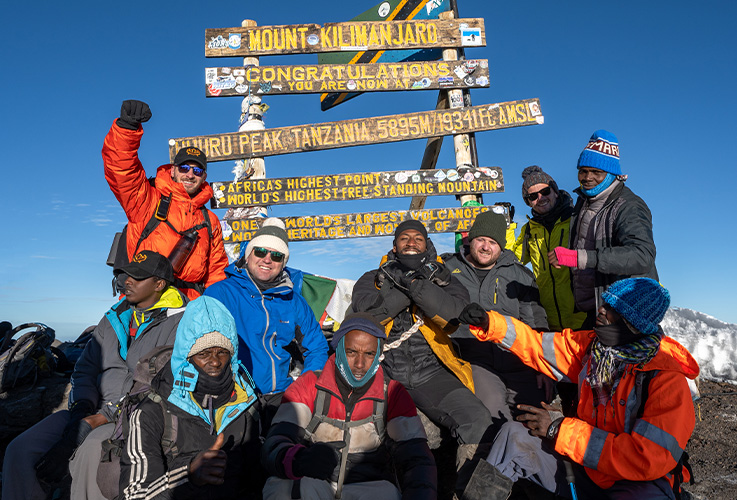
Summit day is a tough, 11 to 16-hour day. This monumental effort is what makes climbing Kilimanjaro such an achievement.
We will arrive at Barafu camp in time for some lunch. Then it is time to prepare and rest. You’ll want to sleep as much as you can in the afternoon and evening (after dinner) because at around midnight, we will don head torches and begin the push to the summit.
We do this as we aim to reach Uhuru Point at sunrise. We will ascend in the darkness, cold, and wind. It goes without saying that under these conditions, climbing is difficult, especially on loose rock and up a very steep slope. This is where your physical prowess and mental toughness will be tested.
It takes 6 hours to get onto the crater rim from camp, just in time to feel the sun hit your face. We can’t describe how amazing this feeling is. Don’t forget it will be really cold, so layers, jackets, and a face covering will make it much more comfortable. From the Crater rim, we have a final one hour walk around to Uhuru Point. The highest point in Africa!
You’ll have time to relax and enjoy the summit, get pictures, and enjoy the views!
The goal is then to get back down to the camp we started at in time for lunch and a break. After lunch, the last thing you will want to do is continue dropping down the mountain, but trust us, it will be worth it! With every meter you descend, you will feel stronger and stronger. Our goal will be Mweka camp, arriving for dinner and a well-earned night’s sleep!
If you have any questions or would like to know more you can head to Legend Expeditions